How to Make Easy Caramelized Onions: Sweet & Jammy Perfection
Caramelized onions are one of those culinary magic tricks that transform a humble, pungent vegetable into something entirely new: a gloriously sweet, deeply savory, and incredibly versatile ingredient. Far from a mere side dish, perfectly caramelized onions are a flavor powerhouse, capable of elevating everything from a simple burger to an elaborate gourmet meal. The secret? Patience, a little heat, and the natural sugars within the onion itself, which slowly break down and caramelize to create that signature golden-brown, jammy texture. While they take time, the process for making
easy caramelized onions is surprisingly simple, requiring minimal effort for maximum reward.
Why Caramelized Onions are a Culinary Game-Changer
Think of caramelized onions as your kitchen's secret weapon, a flavor booster ready to inject rich, complex sweetness and umami into countless dishes. Unlike raw or sautéed onions, which offer a sharp bite, the slow cooking process coaxes out an incredible depth of flavor that is truly unique. You'll love them for several compelling reasons:
- Effortless Elegance: Despite their sophisticated taste, they require just a few basic ingredients – onions, oil, and salt. That’s it! The magic happens through time, not complicated techniques.
- Naturally Sweet Perfection: There's no need for added sugar. As onions cook gently over low heat, their inherent natural sugars undergo the Maillard reaction, resulting in a profound, syrupy sweetness that is entirely organic. This process is key to creating naturally sweet caramelized onions: simple ingredients, big impact.
- Unleash Instant Flavor: A spoonful of these golden beauties can instantly transform a bland dish into a memorable one. They add a sophisticated layer of flavor that's hard to replicate with any other single ingredient. From classic French onion dip to a gourmet grilled cheese, their applications are limitless.
- Beyond Basic Ingredients: While many sauces, marinades, and spices promise to take your cooking to the next level, caramelized onions deliver on that promise with a distinct, comforting sweetness that becomes truly addictive.
Once you master this easy technique, you’ll find yourself reaching for them constantly, whether you're layering them into a sandwich, folding them into an omelet, or using them as a base for a rich soup.
Essential Ingredients for Perfect Caramelized Onions
Making truly spectacular caramelized onions doesn’t require a trip to a specialty store. The beauty lies in the simplicity of the components:
- Onions: The star of the show! For the best results and that deep, naturally sweet flavor, opt for yellow onions or sweet onions (like Vidalia or Walla Walla). Their higher sugar content and milder flavor profile make them ideal for caramelizing. While red onions can be caramelized, they tend to retain a slightly more pungent flavor and a different color, making them less ideal for the classic sweet, jammy profile.
- Fat: A touch of fat is crucial for softening the onions and aiding in the caramelization process. Olive oil is a popular choice, offering a light, fruity note. Alternatively, butter or ghee can be used for a richer, nuttier flavor. A combination of oil and butter often strikes a perfect balance, leveraging butter's flavor and oil's higher smoke point.
- Salt: A pinch of kosher salt or sea salt is vital. It not only enhances the flavor of the onions but also helps draw out moisture, facilitating the softening process and promoting browning. Add it early to help break down the onions.
- Water or Bone Broth: This is the secret weapon for achieving that glossy, jammy finish and preventing burning. A splash of water or broth (vegetable or bone broth work beautifully) helps to deglaze the pan, scraping up all those delicious browned bits (known as "fond") from the bottom and incorporating them back into the onions, deepening their flavor and color.
With just these four components, you’re ready to embark on a culinary journey to sweet, jammy perfection.
Your Step-by-Step Guide to Making Easy Caramelized Onions
While the process requires patience, the actual hands-on work for these easy caramelized onions is minimal. Here’s how to achieve perfectly sweet, golden, and jammy results every time:
- Prepare Your Onions: Begin by peeling and slicing your onions. For a good textural variety, slice some thinly (about 1/8-inch) and others slightly thicker (about 1/4-inch). This blend ensures some onions melt into a jammy consistency while others retain a bit more body. Uniform slices will result in a more even caramelization, so choose your style based on preference.
- Initial Sauté & Browning: Heat a large, heavy-bottomed sauté pan or Dutch oven over medium heat. A wide pan is key to prevent overcrowding and allow for proper evaporation. Add your chosen fat (2-3 tablespoons per large onion). Once shimmering, add the sliced onions. Give them a good stir to coat evenly with the fat. Here’s a crucial step: let the onions sit undisturbed for 2-3 minutes. This allows one side to get beautifully browned and crispy, kickstarting the caramelization. Sprinkle with about 1/2 teaspoon of salt per large onion and toss again.
- Low and Slow Cooking: Reduce the heat to medium-low (or even low if your stove runs hot). This is where patience comes into play. For the first 30 minutes, stir the onions every 3-5 minutes. You'll notice them softening and turning translucent. If they start to stick to the bottom or appear to be browning too quickly, add 1-2 tablespoons of water or broth. Use your spatula to scrape up any browned bits (the "fond") from the bottom of the pan and incorporate them back into the onions. This fond is pure flavor!
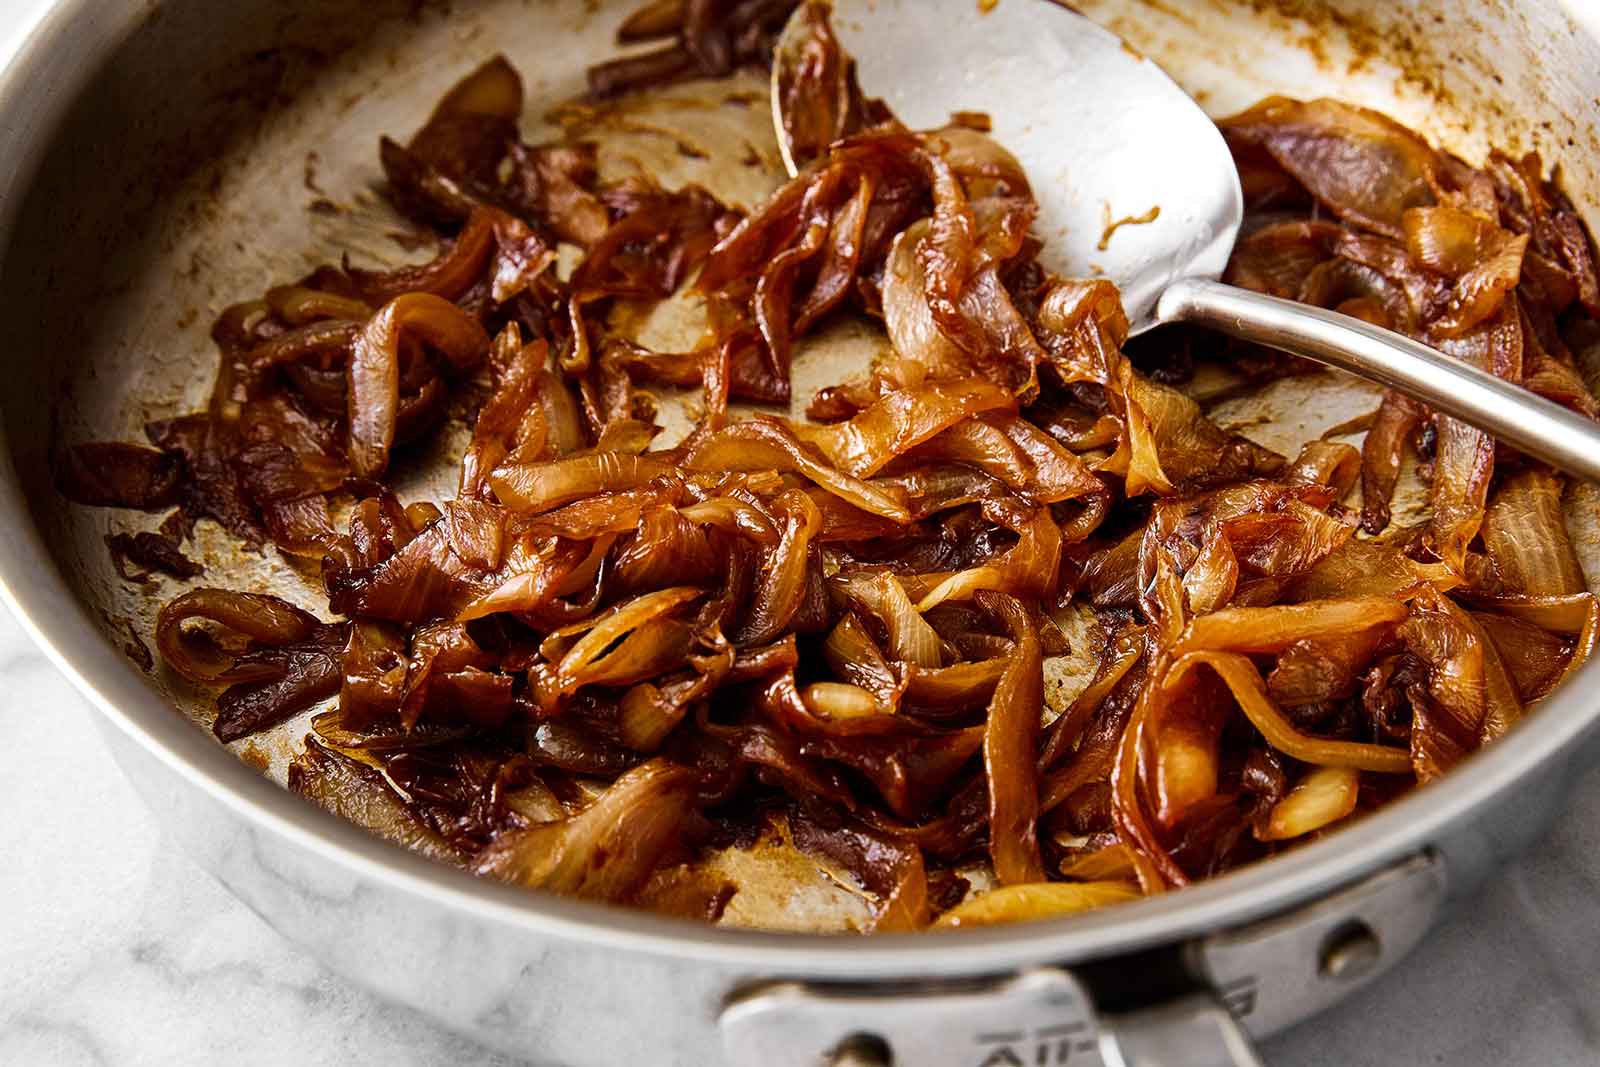
- Deepening the Color and Flavor: Continue this gentle cooking and scraping process for another 30-60 minutes. The total cooking time can range from 45 minutes to 1.5 hours, depending on how many onions you're cooking and your desired level of caramelization. The onions will gradually transform from translucent to a light golden brown, then deepen into a rich amber or dark mahogany color. Keep adding splashes of liquid (water or broth) as needed to prevent sticking and to deglaze the pan, ensuring all those flavorful browned bits become part of your jammy onions.
- Achieving Perfection: Your onions are done when they reach the color and sweetness you desire. For a truly jammy texture, aim for a deep, dark golden-brown. If you prefer a mix of lighter and darker bits, avoid over-stirring. More frequent stirring leads to a more uniform color. Taste and adjust seasoning with additional salt if necessary.
Tips for Success & Common Pitfalls to Avoid
While making easy caramelized onions is straightforward, a few insights can ensure perfect results every time:
- Choose the Right Pan: A wide, heavy-bottomed pan (like a cast-iron skillet or Dutch oven) is your best friend. It provides even heat distribution and a large surface area for evaporation, which is essential for true caramelization rather than steaming.
- Patience is Paramount: This cannot be stressed enough. Rushing the process by using high heat will only burn the onions, making them bitter instead of sweet. Embrace the low and slow method; the minimal hands-on time allows you to do other tasks while the onions work their magic.
- Don't Overcrowd the Pan: Cooking too many onions at once will cause them to steam rather than brown. If you have a large quantity, consider cooking them in batches or using two pans.
- Master Heat Management: Start on medium to get things going, then quickly reduce to medium-low or low. Adjust the heat as needed throughout the cooking process. Your stove's settings might differ, so pay attention to how quickly the onions are browning.
- Utilize Deglazing: Those browned bits stuck to the bottom of the pan are concentrated flavor! Don't let them go to waste. A small splash of water or broth will release them, allowing you to stir them back into the onions for an even deeper flavor profile and that irresistible jammy texture.
Serving Suggestions and Storage
The beauty of these easy caramelized onions lies in their incredible versatility. Once you have a batch on hand, the culinary possibilities are endless:
*
Classic Enhancements: Transform a simple burger, hot dog, or steak sandwich into a gourmet experience.
*
Savory Baking: Fold them into quiches, tarts, frittatas, or even homemade pizza for an instant flavor upgrade.
*
Soups and Stews: They are the foundational ingredient for an authentic French Onion Soup, but also add incredible depth to beef stews or lentil soups.
*
Dips and Spreads: The ultimate secret ingredient for a truly rich and flavorful French onion dip. Spread them on crostini with goat cheese for an elegant appetizer.
*
Breakfast & Brunch: Stir them into scrambled eggs or an omelet, or layer them into a breakfast sandwich.
Storage: Caramelized onions keep exceptionally well, making them perfect for meal prep. Store them in an airtight container in the refrigerator for up to 5-7 days. For longer storage, freeze them in individual portions in an ice cube tray, then transfer the frozen cubes to a freezer-safe bag. They can be frozen for up to 3 months and easily reheated from frozen or thawed.
Conclusion
Making easy caramelized onions might require a little patience, but the hands-off time is generously rewarded with an ingredient that is truly transformative. Their unparalleled sweet, jammy perfection brings a depth of flavor that elevates almost any dish, proving that the simplest ingredients, when treated with care, can yield the most extraordinary results. So, embrace the low and slow method, and prepare to unlock a new level of culinary excellence in your kitchen with this essential, delicious staple.